Monday, January 27, 2014

AfterEffectsで水を表現するとき参考になるチュートリアルをいくつか紹介。


宇宙ときたから、今度は水に関するチュートリアルを集めてみた。
やたらめったらアメリカ語の動画チュートリアルが多いのはご了承ください。


その筋では有名な(どの筋?)DENPO-ZIさんの動画チュートリアル。
タイトルどおり、テキストが水のように崩れる表現の作り方。


海中の作り方(After Effects Style様)
海中、海底の作り方を画像を使ってわかりやすく説明されている記事。
海中の光やホコリの表現にサードパーティー製プラグインのTrapcode Shine、Trapcode Particularを使用しているが無くてもそれなりの海中が作れると思う。


英語動画チュートリアル。
上の「海中の作り方」と同じような海中の作り方。こちらはプラグインを使ってないね。


AfterEffects単体で流水(normal-position様)
自然な流水の表現。Particularが必要なのと、説明が簡素なので初級者を脱却してから覗きにいこう。


英語動画チュートリアル。Particularを使用。
上の「AfterEffects単体で流水」と似たような表現。


お馴染みのayato@web様のチュートリアル。
ウェーブワールドを使った波紋の表現。


3D Ocean(video copilot)
英語動画チュートリアル。
video copilotの海を作るチュートリアル。フラクタルノイズを使うシンプルな作り。基本だね。


海っぽいもの(AEP PROJECT様内の記事より)
上で紹介した「3D Ocean」の応用編と考えるといいかも。
よりリアルな水面を作れる。
一部、Lenscareというサードパーティー製プラグインを使用するが、無くてもいい感じに作れる。


The Caustics Effect(motionworks)
英語動画チュートリアル。
フラクタルノイズとウェーブワールドを使って真上から見た水面の表現を作る。


英語動画チュートリアル。
上の「The Caustics Effect」と似たような、水面とそこに沈むテキストの表現。


英語動画チュートリアル。これも水面+テキスト。


Particularを使用。インクのにじみが画面を走り抜ける。プロっぽい。


Particularを使用。湧水の表現。チュートリアルは無いが、プロジェクトファイルを配布してくれている。ありがたい。


英語動画チュートリアル。Particularを使用。
ディスプレイスメントマップ、Particularを使用して蛇口のようなところから流れ出す水と水しぶきの作り方。


Water Drops(video copilot)
英語動画チュートリアル。窓ガラスに張り付く水滴のチュートリアル。
ちょっと作りが雑なような気がしないでもないが、5分の動画なので見てみよう。


英語動画チュートリアル。よくある、フラクタルノイズで海面と空を作っちゃうけいのチュートリアルだが、レンズフレアの効果のせいか、綺麗に見える。


英語動画チュートリアル。テキストを水で書こうよっていう感じのチュートリアル。


英語動画チュートリアル。Particularを使用。
蛇口から流れる水の作り方。


Water Reflections Tutorial(youtube動画)
英語動画チュートリアル。ありきたりの上から見た水面の作り方のチュートリアルなのだが、作り方がちょっと変わっている。まず煙の動画をvideo copilotから拾ってきて、それにライトなどの効果をつけて水っぽいものを表現するという手法。フラクタルノイズに飽きた人におすすめ。


英語動画チュートリアル。Particularを使用。
素材の動画に対して水の波紋の表現を合成させる方法。


ウェーブワールドを使ってテキストロゴから広がる波紋を作る。


本物。
シャスタ産 クリスタルガイザー 500ml×48本 [並行輸入品]
春日商会 (2013-07-12)
売り上げランキング: 2


関連記事

Sunday, January 26, 2014

素材系サイト:Fudegraphics


Fudegraphics

ブラシやベクターデータ、テクスチャーまで幅広く取り扱っているサイトを見つけたのでメモ。
基本Photoshop使いのためのサイトかな。


Friday, January 24, 2014

【Adobeソフトが無料化】Photoshop、Illustrator、DreamWeaver

【Adobeソフトが無料化】Photoshop、Illustrator、DreamWeaver(NAVERまとめ)


「Creative Suite 2」「Acrobat Pro 8.0」「GoLive CS2」「Illustrator CS2」「InDesign CS2」「Photoshop CS2」「Photoshop Elements 4.0/5.0」が無料ですって。
リンク先のまとめにダウンロードの仕方が紹介されています。

個人的にはCS2はやや使い勝手が悪かったような印象。CS3にしてくれたら良かったのに。


リス CS2-20 コンテナスタイル P
リス
売り上げランキング: 142,012


Wednesday, January 22, 2014

illustratorメモ:イラストレーターでパスに沿ってグラデーションを掛けたい。

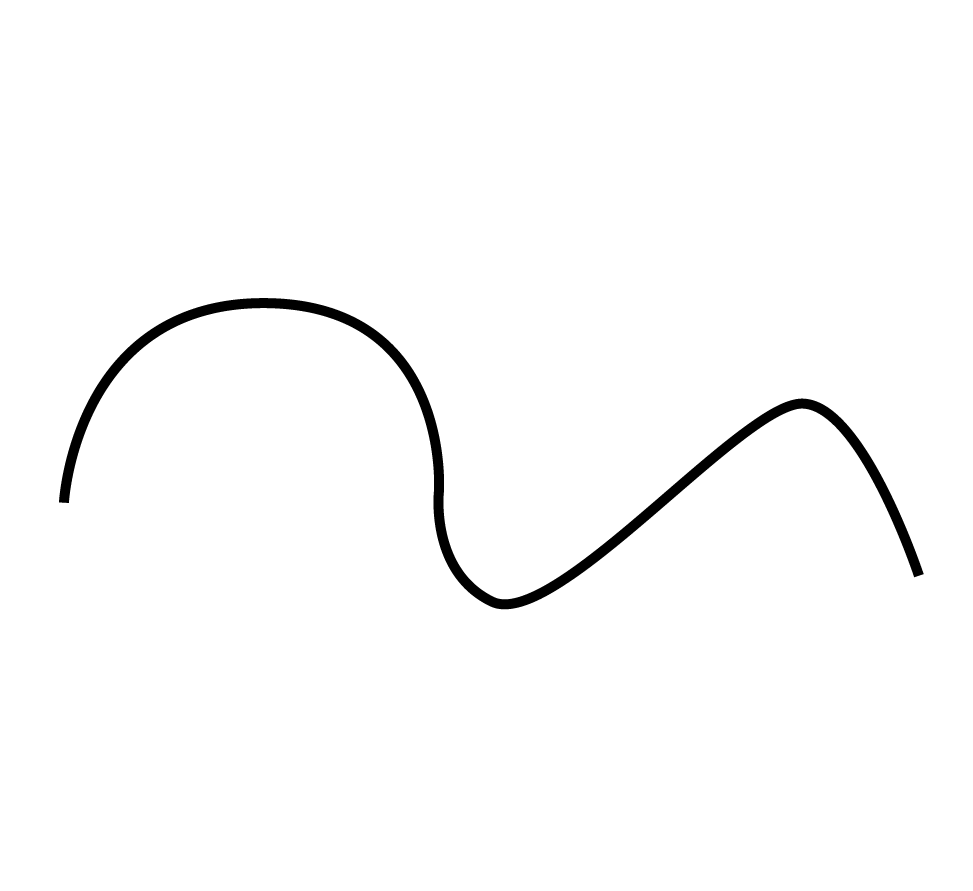
こんな感じのグネグネっとしたパスにグラデーションをかける方法。

CS6では線へのグラデーションが楽勝になったみたいですが(記事の最後にチュートリアル動画を貼っておきます)
管理人はCS5を使っているのでそれ用のやり方を紹介。たぶんもっと下位のバージョンでも問題なかったはず(うろ覚え)
グラデーションを掛けるのに、グラデーションツールは使わないのであしからず。


1.グラデーションを掛けたいパスを用意する。

今回は線幅5ptの線を適当に引きました。

2.グラデーションの素(円)となるオブジェクトを用意する

楕円ツールを使って掛けたい色のグラデーションの素となるオブジェクトを用意しよう。


3.グラデーションの素をブレンドツールでグラデーションにする。

 オブジェクトのメニューから[ブレンド]→[作成]と選択して、複数の円をグラデーション状態にする。(サイケデリックな色合いが管理人の心を表しています。)
 グラデーションの感じが気に入らなかったら、ブレンドを取り消して(MAC:command+z  WIN:ctrl+z)、
 [オブジェクト]→[ブレンドオプション]を選択して、ステップ数や距離などを調整してみよう。


4.線にグラデーションを置き換える。

1で描いたの線と3で作ったグラデーションを両方選択して、
 [オブジェクト]→[ブレンド]→[ブレンド軸を置き換え]を選択。

はい、出来た。すこしキモいね(^-^)


5.グラデーションの向きを反転させる。

あれれ、サムネ画像とグラデーションの向きが違うね。(棒)
 グラデーションの方向を反対にしたいときは、
 [オブジェクト]→[ブレンド]→[ブレンド軸を反転]を選ぶ。
超かっこいいグラデーションが出来た。明日からモテるね(´∀`)


もろもろの注意点

注意点1.ブレンドオプションのステップ数が少ないと・・・
このように軸を置き換えた時に、グラデーションに見えません。(こういう効果はそれはそれで何かにつかえるかもね)


注意点2.ブレンドの素が円ではないと・・・


こんな感じにカクカクになります。残念だね。


CS6の人はこちらの動画を参考にしてください。羨ましいね。


グラデーション (光文社文庫)
永井 するみ
光文社
売り上げランキング: 643,444


Wednesday, January 15, 2014

パスの線を描くとき尖らせる方法(illustrator,Photoshop)

何故か忘れてしまう時があるのでメモっとく。


illustratorやPhotoshopのペンツールでパスの線を描くときに、

こういう風に尖らせたいのに、


こうなってしまう人に向けた初心者用tips。今回はillustratorでの紹介です。


1.ペンツールで最初の点を力強く打つ。(見づらい)


2.次の点(このtipsではこの点がが尖る点になります)をやさしく打つ。
 ドラックしたまま、お好きな角度にパスを調整する。
(この時にshiftを押しながら調整するとハンドルが45°づつ調整できるので便利だね)


3.このハンドルがふにゃあっとなる原因なのでなんとかしたい。


 そこで、尖らしたい点をクリック。
 あら、びっくりハンドルが半分になりました。


4.次の点を打って、調整したもの。完成だね。


5.お試しで、この点もクリックをして同じ手順を繰り返してみた。いい尖り。


6.やりすぎて、どうでも良くなってきたのでこれで終わりにします。
 Photoshopでは3の手順の時にMACならoption(winならたぶんalt)を押しながらクリックするとできるということを先端恐怖症の人には秘密にしておこう。


Photoshopで先端部分だけが丸くなってしまう状態を治す方法が質問されていました。
一応紹介しておきます。


Sunday, January 12, 2014

BradWII firmware

I´ve read a lot of stuff lately on quads and yesterday when i searched Google for the term "auto pid tuning" it mentioned Bradwii, clicking on the article, i found a firmware coded by this guy Brad, part of his code was ported from Multiwii. The intresting thing about his firmware was what it has to offer.
Take a look at this list:-

- Level, Acro, and Semi-Acro flight modes.- Multi-Wii Config compatible (including bluetooth apps, etc). Works on any (and multiple) serial ports.- Simplified settings means there are fewer things (especially PID) that need to be adjusted.- Auto PID tuning!- Position Hold- Mag Hold- Altitude Hold- Return to Home- Standard or DSM2 Satellite receivers- Throttle Helper - Automatically applies extra throttle when tilted in attempt to maintain attitude.- Uncrashability Mode - Takes over when you get below critical attitude or get too far away. Practice those Acro maneuvers without being able to dumb-thumb it!

Not bad...two things really wanted me to try this firmware, the Auto PID tuning and the Uncrashability Mode, if i could run on a correctly PID tuned quad and have the ability to fly without crushing all the time, it would give me some valuable flight time.

unless you can program, the firmware currently runs on these three Hobbyking boards:

- Multi-Wii Pro 2.0
- Multi-Wii 328p
- Multi-Wii NanoWii

No libraries are required to flash the firmware and flashing the firmware is done pretty quickly compared to MegapirateNG, only one file has to be edited and that is config.h,the Bradwii har support for bluetooth and GPS, but my Gimbal was not coded in the software so had to loose that. After flashing. It can be run on MultiWII GUI 2.2.

Took my quad for a spin in the garden where i had my previous crashes in the neighbours garden and with the default settings the quad was very stable, didn' t try the auto PID tuning as i might require more space than my back garden. Must say i am pretty impressed, found a soccer field and here i gained some good flight time, no broken props, and gave me a chance to learn flying. Very stable and quick to trim. This is a good beginner firmware.

Look at this site for more info on this firmware

https://github.com/bradquick/bradwii

http://www.youtube.com/watch?v=xIrLBZttYAU

Flight controller

Looking for a new Flightcontroller, well this site http://oddcopter.com/flight-controllers/ shows you the different controllers, their capabilities and a price comparism. Each controller is reviewed and a link to their rspective web page is also provided. Check it out quite a good site.

Friday, January 3, 2014

Gain flight time by stabilizing your battery

Stabilizing the quad was for me a daugnting task, when i first powered the quad and tried testing it, it simply shook in all directions and was unflyable, searching the net, i read about PID tuning and have to this day still not mastered it correctly, but hopefully i will learn it at some stage. One of the main issues i had when i PID tuned and tested was that the quad kept drifting to the one side, i was convinced that this had to do with the PID tuning being wrong, as i thought that the flight controller would automatically compensate in keeping the quad level so i kept at it and never did find the answer until i after searching the internet i found a thread that explained this issue, after realising that it had more to do with the quads center of gravity, using the transmitt i trimmed the quad accordingly and was able to fly.

After some time of flying i got fustrated because i had to ever so often trim the quad everytime the battery moved this due to a heavy landing or simply because it wasn´t strapped down hard enough, i got extra straps, but the didn´t solve the problem.

The X650F frames comes with a small battery holder, which is almost impossible to stabilize the battery in the same position, so i decided to get rid of it.
After getting rid of it, i mounted the battery directly on the frame, used two velcro straps to stabilise it and that helped somewhat, but small movements still occured.
and time was still being spent trimming. I went down to the local fabric store and bought some velcro with tape on the opposite ends.
Taped some velcro on the battery mount and a bit on the battery. Mounted the battery and used the straps i previously had to tie it down and now my center of gravity is always the same, if you use different batteries you could align each battery and mark the spot, so you can place the battery at the same spot each time. 


If you have some other crazy idea let me know, it might be worth while trying and sharing with others....