Monday, July 7, 2014

AfterEffectsで光を表現するとき参考になるチュートリアルをいくつか紹介。

http://www.digitalartsonline.co.uk/tutorials/after-effects/create-cosmic-lighting-effects-with-particles/

炎、宇宙、水ときたから、今度は光に関するチュートリアルを集めてみた。
お部屋を明るくして読んでください。


言語:日本語
チュートリアルの形式:画像&テキスト

エフェクトの「グロー」とは一味違う綺麗なグローの作り方を説明してくれている記事。
大変勉強になる。


http://fukidashi.web.fc2.com/page1/page17/page17.html

発光する文字(初級)(After Effects STUDY!!様)

言語:日本語
チュートリアルの形式:画像&テキスト

超初心者向けの文字をキラリと光らせるチュートリアル。


http://www.videocopilot.net/tutorials/light_streaks/


言語:英語
チュートリアルの形式:動画
プラグイン:Trapcode Particular

VIDEO COPILOTのストローク状の光を作ろうというチュートリアル。
一時期はやりましたな。


http://www.videocopilot.net/tutorials/3d_light_casting/


言語:英語
チュートリアルの形式:動画

光る球体が画面内を駆け抜けるチュートリアル。
前半の光る球体作り方は目から鱗。


http://www.videocopilot.net/tutorials/light_streaks_2/

Light Streaks 2(VIDEO COPILOT)

言語:英語
チュートリアルの形式:動画

上にあるLight Streaksの応用編だね。


http://www.videocopilot.net/tutorials/lightning_blast/


言語:英語
チュートリアルの形式:動画

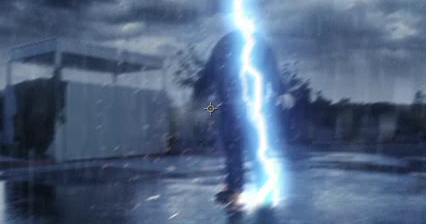
人が稲妻にあたって砕けちゃうチュートリアル(どんなチュートリアルだよ)
グロ注意。
光の表現は動画中盤から。


http://ae-users.com/jp/tutorials/2010/01/particleline/


言語:日本語
チュートリアルの形式:画像&テキスト

「CC ParticleWorld」を使ってストローク状の光を作る。
大変わかりやすい良チュートリアル。


http://library.creativecow.net/mize_rob/AE-Fireworks/1

Creative Fireworks in Adobe After Effects(Creative COW)

言語:英語
チュートリアルの形式:動画

「cc particle world」と「エコー」を使って花火を作ろうというチュートリアル。

途中に出てくるエクスプレッションのリンク先はこちら(ページ中段よりやや下)


http://www.digitalartsonline.co.uk/tutorials/after-effects/create-cosmic-lighting-effects-with-particles/

After Effects & Photoshop tutorial: Create cosmic glows and lighting effects with particlesa

言語:英語
チュートリアルの形式:画像&テキスト
プラグイン:Trapcode Particular

「Particular」を使った光の表現の上級編といったところでしょうか。
すごいやわらかい光の表現です。


http://www.premiumbeat.com/blog/video-tutorial-light-painting-in-after-effects-and-photoshop/

Video Tutorial: Light Painting in After Effects and Photoshop

言語:英語
チュートリアルの形式:動画
その他:photoshop使用

photoshop画像を連続させることで光の軌跡を作るという一風変わったチュートリアル。
途中でシーケンスレイヤーのプラグインの紹介があるが、力技でもなんとかなるような気もする。


http://qubahq.com/2010/08/tutorialpreset-light-wall/ 

Tutorial+Preset: Light Wall

言語:英語
チュートリアルの形式:画像&テキスト
プラグイン:Trapcode Particular,Cinema 4D,VC Optical Flares

プラグインを使いまくってリアルな光る壁を作ろうというチュートリアル。
さすがにハイクオリティです。ちなみにチュートリアル動画は1時間を超えてます。

 

http://vimeo.com/38133040

After Effects Tutorial: Light Wall 

言語:英語
チュートリアルの形式:動画

上のTutorial+Preset: Light Wallの簡易版といったところでしょうか。
こちらはシンプルな作りで初心者にもやさしいです。


クリックをするとYoutubeへ飛びます。


Elegant Light Streaks (No Third Party Plugins) | After Effects Tutorial


言語:英語
プラグイン:VC Optical Flares

「CC Particle Systems II」を使ってストローク上の光を作るチュートリアル。
「Optical Flares」を使っているがレンズフレアでなんとか代用できそうな気もする。


クリックをするとYoutubeへ飛びます。

言語:英語
プラグイン:Trapcode Particular,Trapcode Shine

「Particular」と「Shine」を使ってのシンプルな放射状のライティングの作り方。
本当にシンプルな「Particular」と「Shine」の使い方。初心者向け。


クリックをするとYoutubeへ飛びます。


After Effects Tutorial @ [Tutotrialpilot.net] Particle Flow


言語:英語

「CC ParticleWorld」を主に使って光の粒が泡状に発生する空間の作り方。


クリックをするとYoutubeへ飛びます。


言語:???
プラグイン:Trapcode Particular

「Particular」を使ってエネルギー体がぶつかり合う映像の作り方。


クリックをするとYoutubeへ飛びます。

のはなしし
のはなしし
posted with amazlet at 14.07.08
伊集院 光
宝島社
売り上げランキング: 182

Tuesday, June 24, 2014

Hobbyking H4 Quadcopter motor mount repair

Just a quick tip on the fixing the weak motor mounts on the Hobbyking H4 quadcopter, i mentioned it in an earlier article, but thought that i would dedicate a small article on this matter.

I purchased a set of aluminium mounts off ebay at cnc-solution-uk http://www.ebay.com/itm/251551176343?ssPageName=STRK:MEWNX:IT&_trksid=p3984.m1439.l2649 for £9 + shipping, he has the original H4equivelent in alu, but at the time of ordering, his stock was depleted so i opted for another design, this required that i re-drill the mounting holes on the tube.
The package comes with 16 screws for mounting the motors.

I weighed the original mounts as i thought the alu version would be much heavier.

It turns out to weigh exactly the same 10 grams.
I weighed the mounts for the Hobbyking X60F, which were currently mounted on the quad, they weighed in at 33 grams, so a bit of weight saving can be done here.

Mounting required drilling a new hole through the arm.

Simple.

Mounting the motor was pretty easy compared to the original H4 mounts, the motor aligns nicely and the screws are easily mounted.

Bought some replacement square tubes off ebay, for $8 http://www.ebay.com/itm/300774845368?ssPageName=STRK:MEWNX:IT&_trksid=p3984.m1439.l2649 for future needs, in case of bent or broken arms.

Monday, June 23, 2014

Illustrator:和柄のパターンの作り方を紹介。24種類のtips&リンク集


 これからますます需要の高まる和柄のパターン(もしくは単体のオブジェクト)のイラストレーターでの作り方を紹介するよ。


まずは基本をチェック


まずは「そもそもイラストレーターのパターンって何よ」って人や「単体のオブジェクトは自分で作れるけど、それをパターンにする方法がようわからん」って人のためのリンクから紹介するyo。


パターンを作る(どどファクトリー様)
管理人がネットを巡回した中でたぶんこれが一番わかりやすいと思います。って感じたパターンについての解説。

illustrator(イラストレーター)の柄の作り方、スウォッチパターンの仕組みを知る (7日間イラストレーター超速マスター様。)
ここで書かれているように、透明のボックスを最背面に作るのはパターンを作る上で超重要だから気をつけてね。

継ぎ目のない柄やパターンをつくりたい(7日間イラストレーター超速マスター様。)
シームレスパターンの作り方の基本だね。

お花のイラストの作り方 (DESIGN TIPS様)
直接和柄パターンとは関係ないんだけど、「回転させてコピー」は幾何学模様を作るときに絶対必要なテクニックだから覚えておこうね。

パターンを自由にカスタマイズ(パターンデザインのサイト)
完成したパターンをさらに細かく調整したいときに参考にしようね。


サムネイルをクリックすると各tipsに飛ぶよ。(別ページ)


雪輪
http://kross-design.blogspot.jp/p/blog-page.html
 (ゆきわ) 
菊格子
http://kross-design.blogspot.jp/p/blog-page_25.html
(きくごうし)
青海波
http://kross-design.blogspot.jp/p/blog-page_3387.html
(せいがいは)
花青海波
http://kross-design.blogspot.jp/p/blog-page_3127.html
(はなせいがいは)

摺疋田
http://kross-design.blogspot.jp/p/blog-page_1254.html
(すりびった)
紗綾形
http://kross-design.blogspot.jp/p/blog-page_3956.html
(さやがた)
毛卍文
http://kross-design.blogspot.jp/p/blog-page_26.html
(けまんもん)
六つ手卍
http://kross-design.blogspot.jp/p/blog-page_3601.html
 むつでのまんじ)
分銅繋ぎ
http://kross-design.blogspot.jp/p/blog-page_8586.html
(ふんどうつなぎ)

毘沙門亀甲
http://kross-design.blogspot.jp/p/blog-page_1927.html

巴
http://kross-design.blogspot.jp/p/blog-page_8595.html
(ともえ)
切り金
http://kross-design.blogspot.jp/p/blog-page_27.html
(きりがね)

千鳥格子
http://kross-design.blogspot.jp/p/blog-page_8322.html
(ちどりごうし)
ねじ梅
http://kross-design.blogspot.jp/p/blog-page_9581.html
(ねじうめ)
雷紋
http://kross-design.blogspot.jp/p/blog-page_2917.html
(らいもん)
井桁卍
http://kross-design.blogspot.jp/p/blog-page_6629.html
(いげたまんじ)

蚊絣
http://kross-design.blogspot.jp/p/blog-page_28.html
(かがすり)
麻の葉
http://kross-design.blogspot.jp/p/blog-page_29.html
(あさのは)
矢絣
http://kross-design.blogspot.jp/p/blog-page_6812.html
(やがすり)
露芝
http://kross-design.blogspot.jp/p/blog-page_2090.html
(つゆしば)

七宝繋ぎ
http://kross-design.blogspot.jp/p/blog-page_30.html
(しっぽうつなぎ)
籠目
http://kross-design.blogspot.jp/p/blog-page_7777.html
 (かごめ)
角繋ぎ
http://kross-design.blogspot.jp/p/blog-page_6365.html
(かくつなぎ)
算木崩し
http://kross-design.blogspot.jp/p/blog-page_1357.html
(さんぎくずし)
余談ですがブログでテーブルタグを使いたいときの便利サイト。
テーブルタグ作成ツール


本当は作り方のリンク集を作るつもりだったのですが、意外とネット上にパターンのチュートリアルが少なくてほとんどの記事を管理人が作る羽目になりめちゃくちゃ疲れました。
自分でも少し説明不足かななんて感じるチュートリアルもあるので、時間があるときにちょこちょこ修正していこうと思います。
間違いの指摘や、もっと詳しく説明してほしいところがありましたらお気軽にコメントください。m(__)m

いちいち作ってられない人におすすめの書籍。

このブログで何度か紹介をしていますがベクターデータの和柄の素材集のリンクを張っておきます。

今回のtipsは管理人の技量もありかなりシンプルなつくりのパターンでしたが、こちらの書籍に付属しているパターンのデータはさすがかなり作りこまれたものになっています。

また、ただの素材集ではなく作者さんのパターンを使った制作例も見ることができるので、大変重宝しています。


和柄パーツ&パターン素材
成願 義夫
ソーテック社
売り上げランキング: 114,044
和柄パーツ&パターン素材 Vol.2
成願 義夫
ソーテック社
売り上げランキング: 41,039


Friday, June 20, 2014

Bloggerのテンプレートサイトを少々紹介。


ずっと「Awesome Inc.」のテンプレートを使っているのもなんなんで、そろそろリニューアルでもしようかなとBloggerのテンプレートを探してみた。海外の良サイトをみつけたので紹介するっす。


たぶんBloggerテンプレートサイトでは一番有名そう。たくさんの人が記事にしてるね。


サイトが重いですな。それだけテンプレートの品揃えが豊富なのでしょう。


シンプルおしゃれ系のテンプレートが多いですな。


ダウンロードしたテンプレートの設定やカスタマイズのしかたに関しての良記事。
Blogger(ブロガー)で海外のテンプレートを日本語化カスタマイズして利用する方法


紹介先のサイトでテンプレートを探しているだけでブログをリニューアルした気になりそうです。
はてさて、リニューアルはいつになることやら。


Monday, June 16, 2014

悪魔のような犬

徹夜明け用動画第二弾。(クリックするとYoutubeに飛びます。)


ゾッとした。もう寝ます。

猫が歩いているだけの動画

徹夜明けにほどよい動画。(クリックするとYoutubeに飛びます。)


やばい、納期がっ(ry

Sunday, June 8, 2014

Why not to throw away broken things!

Well novices like myself, will often run into broken propellers,  motor mounts, motor arms and so on. Getting replacement parts takes time getting and costs money, as an example just ordered the H4 quad and after 3 flights the motor arm and motor mount broke...so another break from quad fun....no, get your broken stuff and DIY. The previous frame i was using the, Hobbyking X650F Glass Fiber Quadcopter Frame had a broken motor mount so i striped the whole unit and grabbed two motor mounts and arms, i was able to mount them on the H4 despite the fact that the width of the H4 tube is 0,8 mm and the X650F is 13mm. Not sure if the frame will hold but it is worth the try. I didn´t have a drill to drill new holes to mount the front two arms in a H form, so i used the two holes in the front of the frame. Not sure whether this construction will work, will have to just try, if not then i just re-drill the holes and go back to the original design.


Screw, bolts, plastic screws and so on are worth a fortune, once vibrations cause screws to loosen themselves it is always nice to have reserves.

Shorted and buggered ESC´s can be used to test firmware upgrades prior to upgrading your working ESC´s on your DIY home made firmware flash unit, same thing goes for flight controllers. used cables can be reused on new ideas and so on. In short broken bits, strip and keep they will come in handy.

Sometime ago, i had bought a Hobbyking Multiwii Pro, after flying during the more wet, snowy winter season a couple of bearing in the motors ceased up, these were replaced. Later the quad began behaving very iradical and flipped all the time. I connected it to Mission planner and tested the Baro and GPS. The compass test reported a defekt and i thought that this was gone. I changed my flight controller but kept the Multiwii Pro. Just reently i decided just for fun to test if i could flash the Multiwii Pro with the Megapirates flashtool, so i flashed it with version 3.1.5 and tested the compass again, it reported the same previous defect. I then erased the eeprom and tested again. The compass was suddenly back in action. My beloved Multiwii Pro is once again mounted on my quad and back in action....so don´t throw away unless you are sure...